Add a Purchase Contract for inbound tickets received from a Producer or Dealer.
| Access |
| Grant permission to User Profiles in Access User Profiles > select a User Profile > Menu Security > Reports > Main Menu > Contracts. |
| Grant permission to User Profiles in Merchant Ag FIN > Admin > System Security > Access User Profiles > select a User Profile > Security tab > Commodity & Grain Merchandising > Contracts > Access Purchase Contracts. |
Clicking the Add button displays the Add Purchase Contract dialog box. Enter basic contract information and click the Approve button to create the contract. Before approval, a contract is considered a soft offer.
Add Contract
After opening Access Purchase Contracts, click Add.
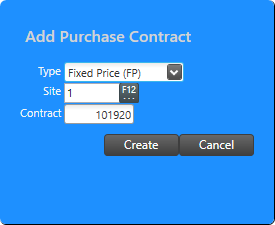
Use the drop down list in Type to select
-
Basis Only- The difference between the futures price for a commodity and its cash price at a specific location.
-
Bushels Only- A contract that establishes the quantity only of a commodity that will be delivered to a specified Site within a delivery period.
-
Delayed Price
-
Fixed Price
-
Futures Only- The Futures Month and Futures Price is established but not the Basis. This is a contract traded on a futures exchange that calls for delivery of a standardized amount and quality of a commodity during a specific month. Learn about Roll Hedge to Arrive Contracts here.
The Site defaults to the Site ID for the user and can be changed by clicking into the field or use F12 to search.
The Contract ID is system assigned with the next available contract ID but can by edited by clicking into the field.
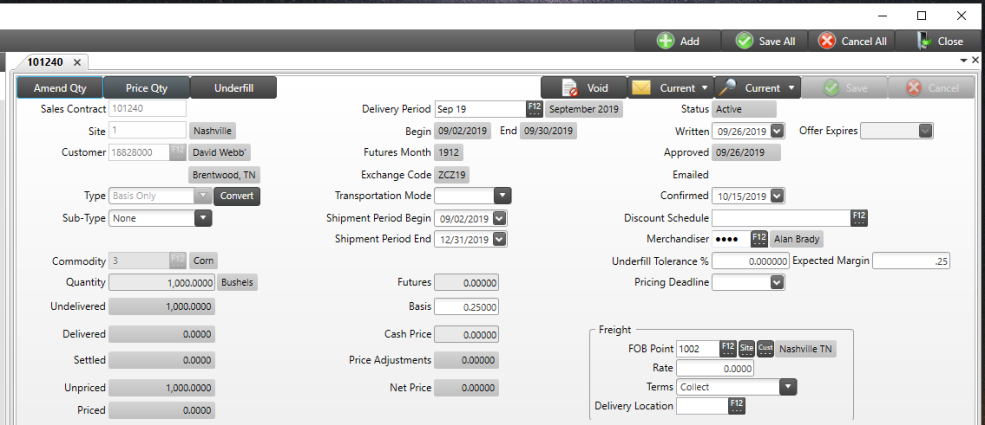
In the Customer field enter the Producer ID or use F12 to search.
Enter the  Commodity by entering the Item ID or use F12 to search. – Enter the commodity being sold
Provide the Quantity to be sold.– Enter the amount of commodity being sold
Select the Delivery Period for the contract by entering the ID or use F12 to search. The delivery period also directs the contract to the proper DPR location. Learn more about Delivery Periods here.
The Begin and End dates populate automatically when the Delivery Period is selected.
Futures Month and Exchange Code populate automatically when the Delivery Period is selected.
Use the drop down list in Transportation Mode to choose Truck, Railcar or Barge. This is an optional field.
In the Shipment Period Begin and Shipment Period End define the date range for shipping the contract by using the available drop down calendar or enter using the mm/dd/yyyy date format.
Futures displays the futures price used for pricing.
Click into the Basis field and enter the sales basis price.
The Cash Price will be automatically calculated based on Futures +/- the Basis.
A Price Adjustments can be entered on the contract and will adjust the contract price.
Net Price is calculated from Cash Price +/- the Price Adjustments.
Enter the ID of the Merchandiser. Add the Merchandiser signature to contracts automatically in Setup > Access Individuals. Learn more here.
Dates are populated for when the contract was
-
Written defaults to current date and can be changed but the DPR date will always be the current date.
-
Offer Expires
-
Approved
-
Confirmed sets the date a fully executed contract has been received from a producer. no date appears, it's assumed the contract is unsigned.
Enter the Discount Schedule ID to be used on tickets applied to this contract or use F12 to search.
In the Freight section, provide
-
FOB Point indicates the Location where commodity will be delivered or ownership changes. Enter the FOB Point ID or use F12 to search or click Site which adds the FOB Point from the allocations contract Site or Cust to add the Customer Address as the FOB Point. Learn more about Access Freight Points here.
-
In Freight-Rate enter the amount of freight to be charged per unit of measure which is used in Mark To Market calculations.
-
Freight Terms, use the drop down list to select
-
Collect – Freight paid by Buyer
-
Collect and Allowed – Freight paid by Buyer and then charged to Seller by deducting from the invoice
-
Prepaid – Freight paid by Seller
-
Prepaid and Charged – Freight paid by Seller, then collected from Buyer on invoice.
Contract Prices are displayed in
-
Futures accept the default or enter a new price.
-

 Hedge Price is available for locations with the Site P&L parameter enabled.
Learn more here.The Futures price for Locational Hedge can now be overridden on Futures Only contracts using the new Hedge Price field. Grant access to this new functionality in Merchant Ag FIN > Admin > System Security > Access User Profiles > select a Profile > Security tab > Commodities & Grain Merchandising > Contracts and set Override Locational Hedge Futures Price to 1 for access.
Hedge Price defaults to zero and can be added or edited prior to the contract being Approved.
-
Basis is entered when creating the contract
-
Cash Price is calculated using the Futures price +/- Basis
-
Price Adjustments, the total will increase or decrease the contract price and are entered at a later point in time and displayed in this field.
-
The Contact Net Price is the Cash Price +/- Price Adjustments.
Click here to learn about Amend Quantity and Underfill.
To learn how to Price Contracts, click here.
General
On the General tab, add additional details about the contract in the alpha-numeric fields.

The fields available include
| Customer Contract | Number of Loads |
| Other Terms prints on documents | Comment does not print on documents |
Adjustments
Add an Adjustment to the Contract by clicking the  button and entering an Adjustment ID or use F12 to search. Learn more about creating Adjustments here.

Price Factors is available instead of using adjustments on a contract.

Click into needed fields and enter the amount of fee, price, long or short call or put. The Price Adjustments field will update automatically.
Futures
Add a Futures to the contract by clicking  to access the Select Futures window.

Options
To create see Risk Management > Access Options.

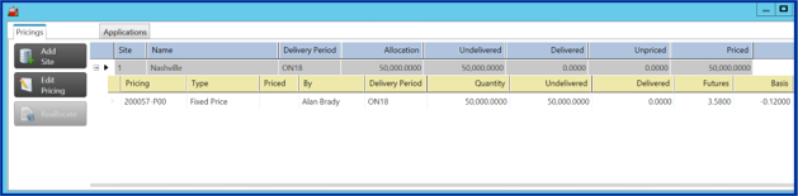
Pricings

Click  to access the Add New Site Allocation window.
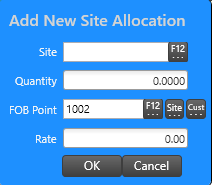
|
Enter the additional Site. Provide the item quantity for the Site. Choose the FOB Point using F12 or click Site which adds the FOB Point from the allocations contract Site or Cust to add the Customer Address as the FOB Point. |
Reallocate
For this example let’s say you need to move 1,000 bushels from site 2 back to site 1. Start by clicking on the Reallocate button.
On the Reallocate Contract Quantity - Staging screen find the site you are moving from and select that line. In our example site 2.
Enter the number of bushels in the Move Quantity field
Enter the site you are moving to in the To Site field
Click the Proof button to make sure everything looks right
Reallocate Quantity
On this screen review the changes you want to make. If they look correct click the Post button. If not, click the Cancel button.
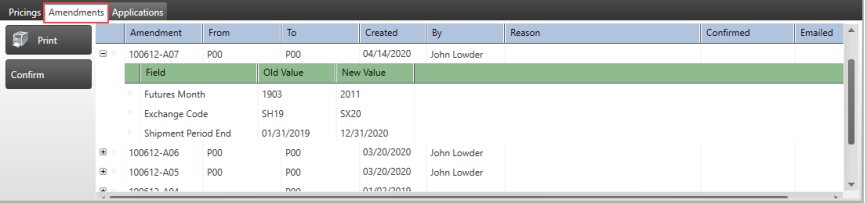
Amendments
View, print and confirm contract amendments. Expand the plus sign to the left of the Amendment column to view details. An Amendment is added to the contract to track changes.
Applications
The quantity of the contract will be assigned to the Site selected when the contract was created or split between multiple sites. Additional sites can be added at any point during the duration of the contract.